


| Previous - Multi-range Designs. | Return to Index. | Next - Editing and Importing your own textures. |
This chapter covers the creation of sloped and pitched ceilings, velux windows, raised flooring and pipe runs.
The principles covered are common to all room systems. Where appropriate differences between the rooms systems will be highlighted.
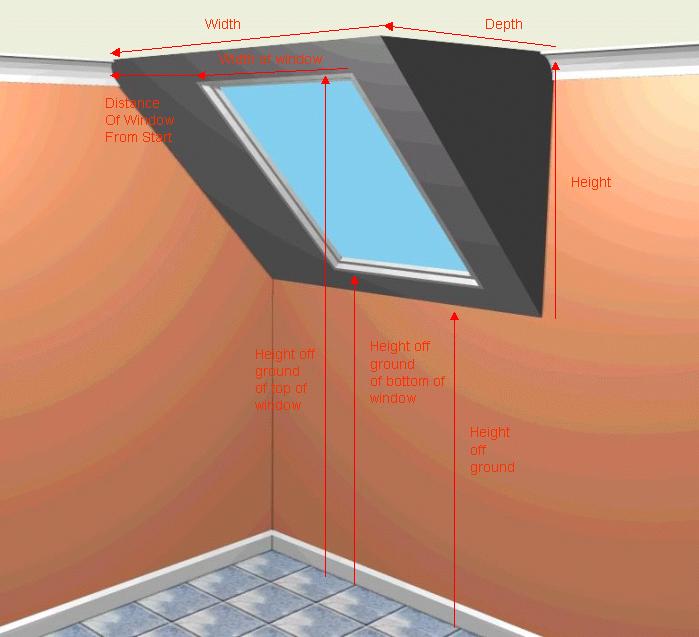
To create a sloped ceiling, use a Ceiling Wedge:
| Room system | Unit Toolbar buttons | Item name |
|---|---|---|
| Kitchen |
|
Wedge |
| Bathroom |
|
Wedge |
| Bedroom |
|
Top Wedge |
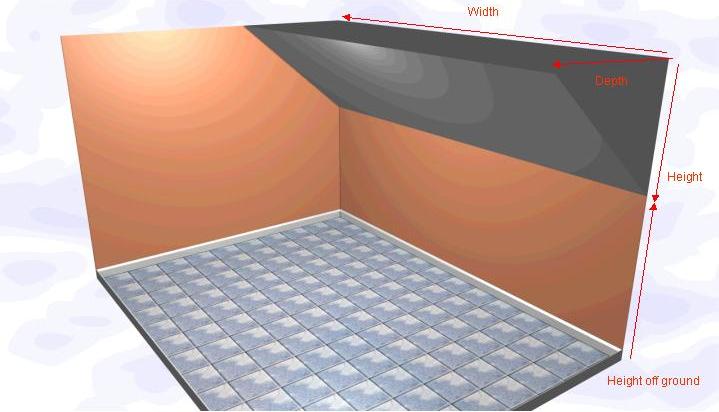
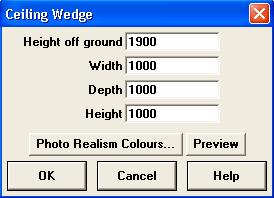
Specify the dimensions of your wedge:
Return to top.
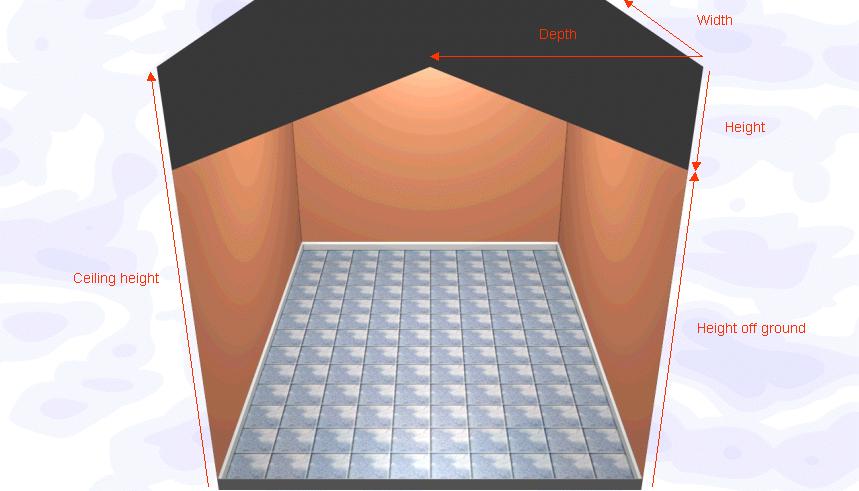
For a pitched roof, you create two wedges (as above) locked to opposing walls.
You also need to set the ceiling height in your design to the highest point in the room. Ceiling height is specified under This Design - Room Settings. It can be changed at any point during the design process, though it's considered good practice to change it before starting the design.
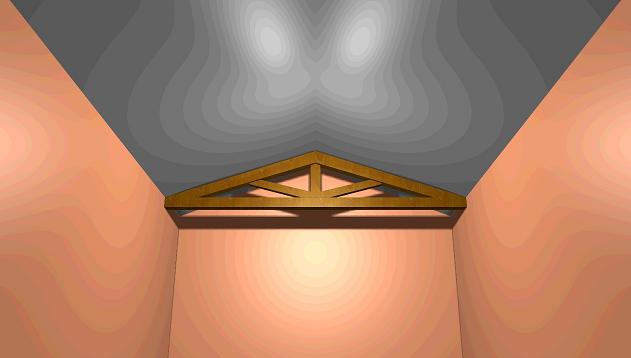
Here is the view from inside the room, looking up at the ceiling. The ceiling beams are an "A-Frame":
| Room system | Unit Toolbar buttons | Item name |
|---|---|---|
| Kitchen |
|
A-Frame |
| Bathroom | Unavailable | Unavailable |
| Bedroom | Unavailable | Unavailable |
Return to top.
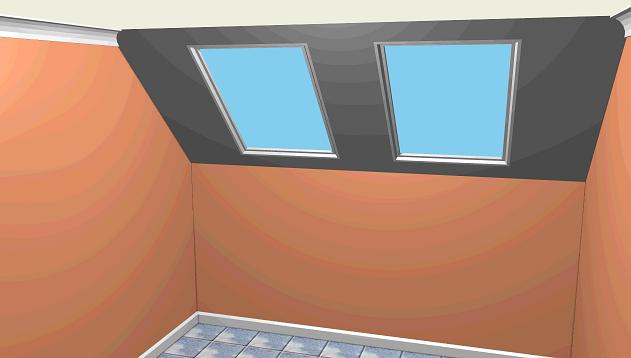
Ceiling wedge with a built-in velux window can be found here:
| Room system | Unit Toolbar buttons | Item name |
|---|---|---|
| Kitchen |
|
Ceiling Wedge with Velux Window |
| Bathroom |
|
Ceiling Wedge with Velux Window |
| Bedroom |
|
Ceiling Wedge with Velux Window |
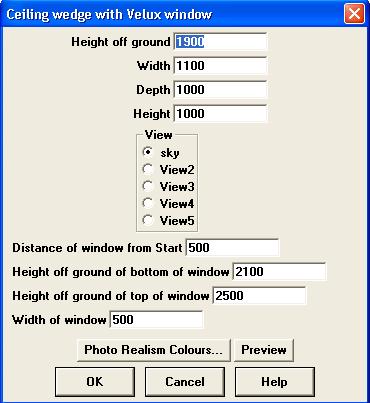
The window can fill the wedge entirely i.e. the window width can be the same as the wedge width.
For multiple window, add as many wedges as required.
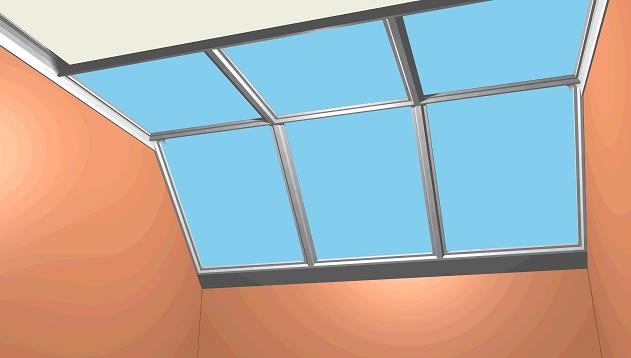
You can also combine the wedge with velux with a flat velux window to create an conservatory-style roof:
| Room system | Unit Toolbar buttons | Item name |
|---|---|---|
| Kitchen |
|
Velux Window for Flat Ceiling |
| Bathroom |
|
Velux Window for Flat Ceiling |
| Bedroom |
|
Velux Window for Flat Ceiling |
Return to top.
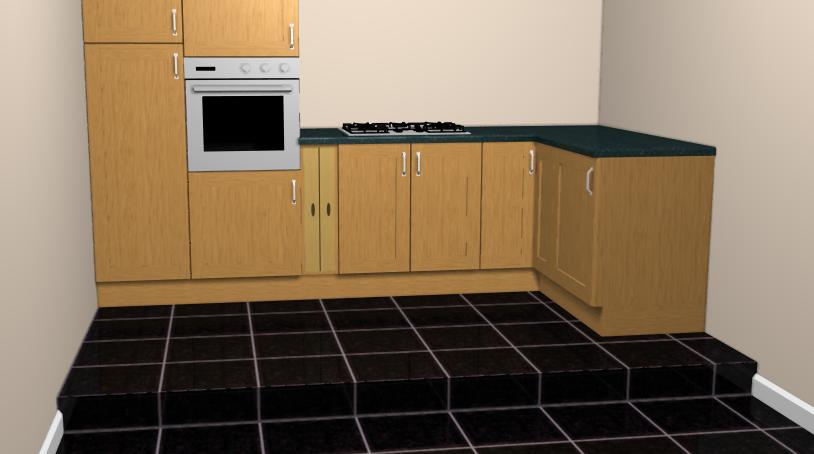
Create the raised floor using a cubic box.
| Room system | Unit Toolbar buttons | Item name |
|---|---|---|
| Kitchen |

|
Cubic box |
| Bathroom |

|
Cubic box |
| Bedroom |

|
Cubic box |
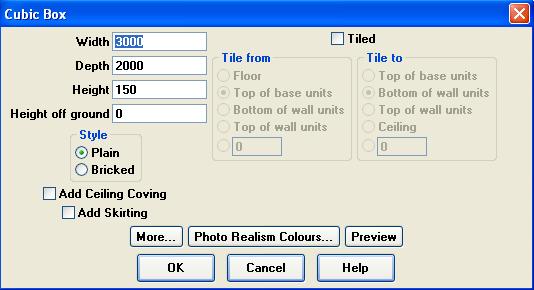
Use the cubic box to create a false floor. To create steps, stack cubic boxes on top of each other.
Units will sit on the "real" floor. Adjust the "Height off ground" value to make them sit on the "fake" floor. You will need to raise every item that sits on the raised section, including wall units (adjust the "Distance to move up" value).
Return to top.
Create a cubic box as described above.
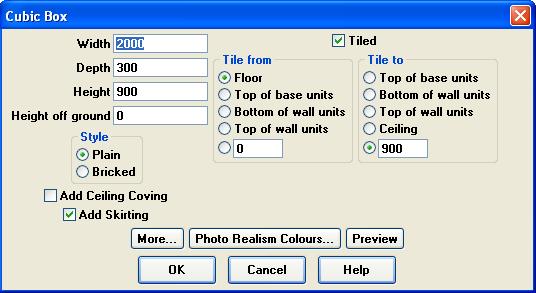
Note that the tiling has been turned on. ArtiCAD will automatically tile the cube using the same tile selection as the rest of the design.
Units will not lock to the front of the cube, but the wall behind it. Move the units into the room using the method described in Positioning units with Drag and Drop - moving a specific amount.
Return to top.